
| Tweet |

Custom Search
|
|

|
||
 3500 ENGINES
DISASSEMBLY AND ASSEMBLY
PISTONS
INSTALL PISTONS
1214-12
Tools Needed
ABC
D
6V4020
Piston Ring Expander
1
Pliers
1
9S9082
Engine Turning Pinion
1
6V4021
Piston Ring Compressor
1
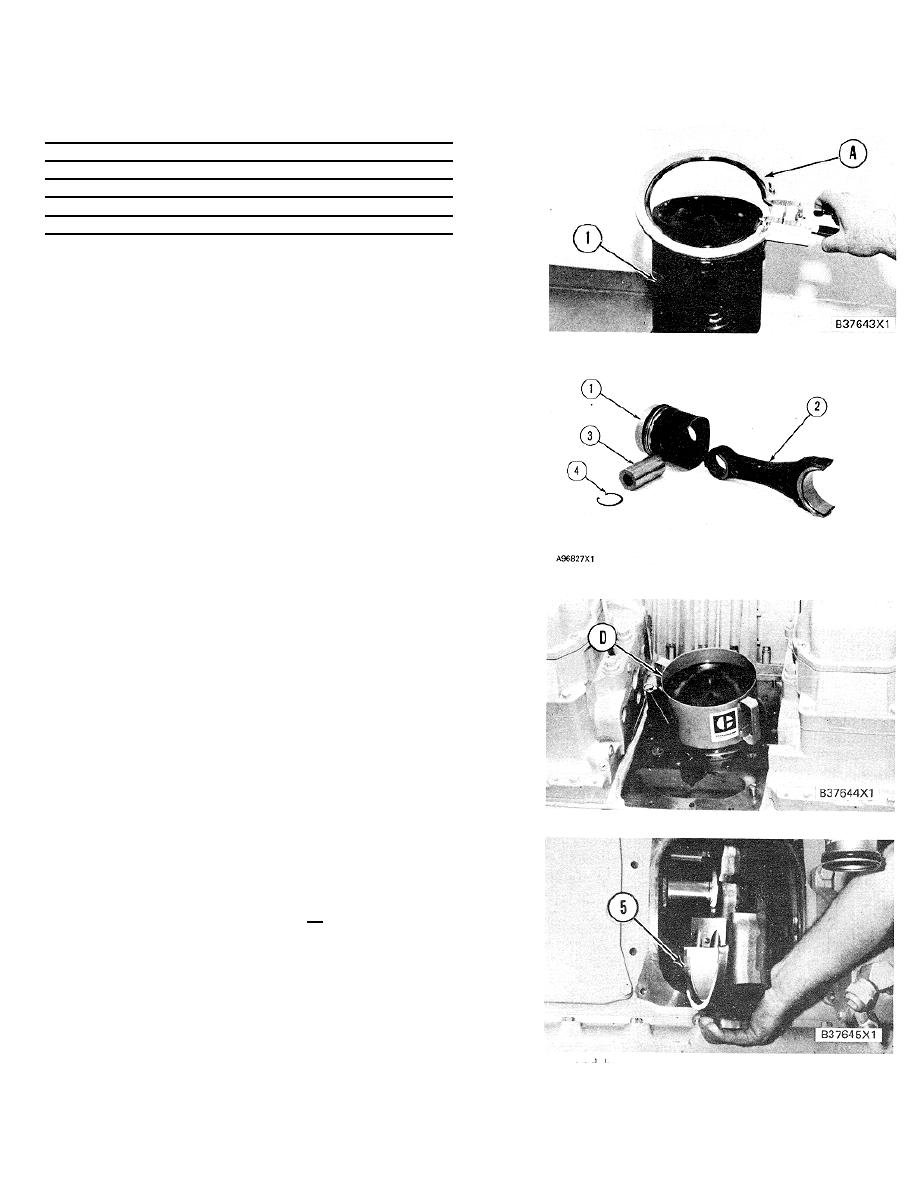
1.
Clean the ring grooves in the piston.
2.
Use tool (A) to install the oil ring on piston ( 1).
Make sure the oil ring spring ends are 1800
apart from the ring end gap.
3.
Use tool (A) to install the two compression rings
on piston (I ). Make sure the sides with the "UP"
marks are toward the top of the piston and all
three ring end gaps are 120 apart after
installation.
4.
Put clean engine oil on pin (3), the pin bearing in
rod (2) and the pin bore in piston ( 1). Put rod
(2) in position in piston (1) and install pin (3).
Use tool (B) to install rings (4) on each side of
pin (3).
5.
Install the upper half of the connecting rod
bearing in the connecting rod and put clean
engine oil on it. Make sure the tab on the back
of the bearing fits in the groove of the rod.
6.
Put clean engine oil on the piston rings and
cylinder liner bore. Use tool (D) to put the piston
rings under compression and install the pistons
and connecting rods in the cylinder liners.
NOTICE
Make sure the piston is installed with the side of the
connecting rod that has the chamfer in the rod
bearing bore next to the crankshaft thrust surface.
The side with the square shoulder for the connecting
rod bearing bore must be next to the other
connecting rod on the same crankshaft journal.
7.
Install the lower half of the connecting rod
bearing in cap (5) and put clean engine oil on it.
Make sure the tab on the back of the bearing fits
in the groove of the cap.
8.
See INSTALL CONNECTING ROD BEARINGS
for the procedure to install the connecting rod
caps and to check the bearing clearance.
9.
Check the side clearance between two
connecting rods on the same crankshaft journal.
The clearance must be 0.85 + 0.23 mm (.0335
+end by: .0091 in.) for the 12 cylinder and 0.900
+ .282
a) install cooling jets mm (.0354 +
.0111 in) for the 8 cylinder.
b) install spacer
plates
397
|
||
|
||


