
| Tweet |

Custom Search
|
|

|
||
 3500 ENGINES
DISASSEMBLY AND ASSEMBLY
CRANKSHAFT
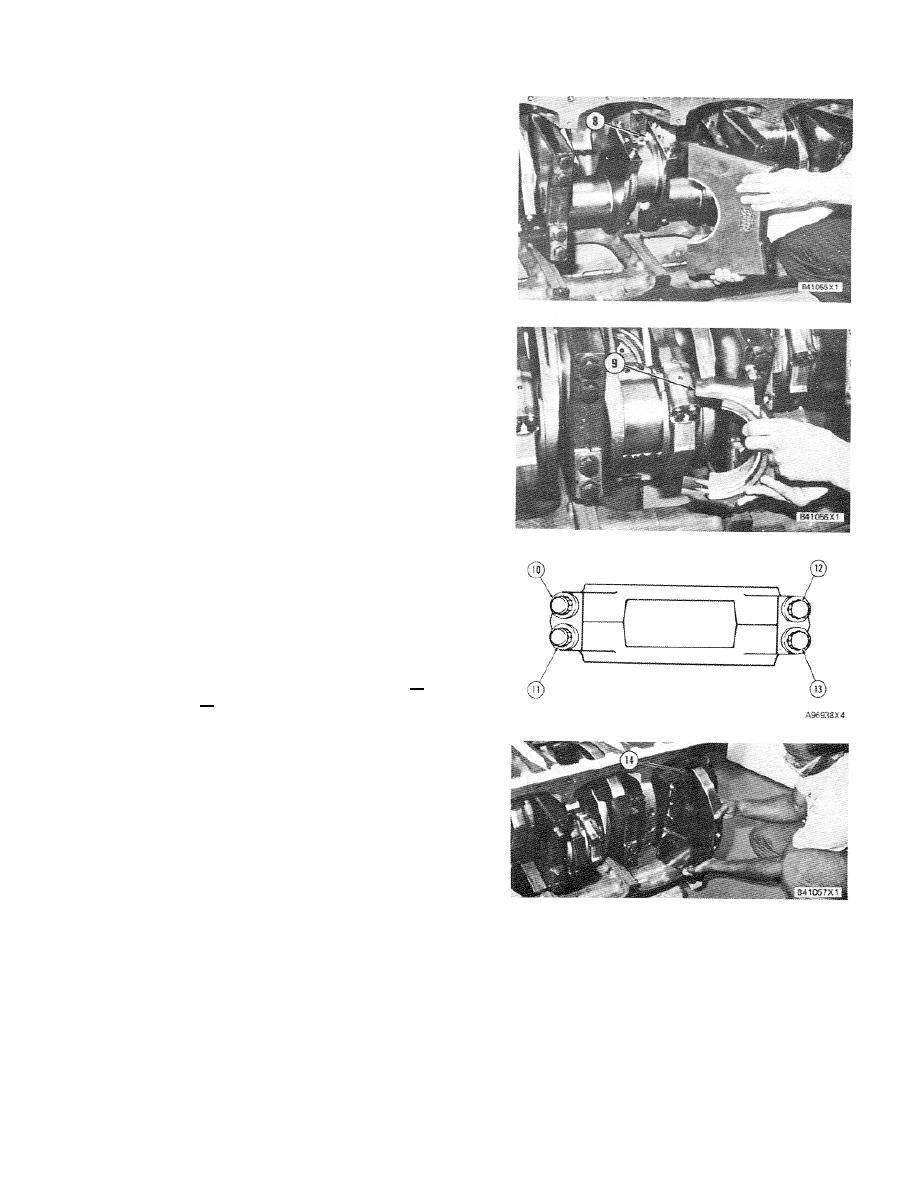
6. Put clean engine oil on the thrust plates and
install thrust plates (8) on each side of the
center main bearing. Install the center
main bearing cap and the bolts to hold it.
Use the same procedure in Step 5 to
tighten the bolts.
NOTE: See INSTALL CRANKSHAFT MAIN BEARINGS
for the correct bearing clearance check and crankshaft
end play.
7. Remove the wire that holds the upper half
of the connecting rods in position. Make
sure the upper and lower halves of the
bearings are in position on the connecting
rods and the rod caps. Put clean engine oil
on the bearings.
NOTICE
Do not use an impact wrench to tighten the bolts 900
+ 50 of a turn more.
8. Put the connecting rods in position on the
crankshaft. Install caps (9) in the same
location as they were removed from with
the number on the side of the cap next to
the number on' the side of the connecting
rod.
Put 5P960 Multi- purpose Type
Grease on the bolt threads and contact
surfaces of the bolts and caps and tighten
the bolts in number sequence as follows:
NOTE: Bolts (12) and ( 13) are on the end of the rod cap
opposite the end that has the location pin for correct
installation.
a) Tighten bolts No. 10 and 11 to a torque of
90 + 5 N-m (65 + 4 lb.ft.).
b) Tighten bolts No. 12 and 13 to a torque of
90 + 5 N-m (65 + 4 lb.ft.).
c) Tighten bolts No. 12 and 13 again to 90 + 5
N-m (65 + 4 lb.ft.).
d) Tighten each bolt 90 + 50 of a turn more.
NOTE: See INSTALL CONNECTING ROD BEARINGS
for the correct bearing clearance check.
NOTICE
Each counterweight has a number and must be
installed in the same position as the correct number
on the crankshaft mounting pad to prevent damage
to the crankshaft when the engine is run.
9. Make sure the dowels are in position and
install counterweight (14) on the crankshaft.
NOTICE
Do not use an impact wrench to tighten the bolts
end by:
1200 + 5 of a turn more.
a) install rocker shafts and push rods
10. Put 2P2506 Thread Lubricant on the
b) install front drive housing
counter-weight bolts and tighten the bolts to
c) install front balancer (3508)
a torque of 50 + 5 N-m (37.5 + 4.0 lb.ft.).
d) install rear gear group
5
Then tighten the bolts 120 + of a turn
e) install piston cooling jets
more.
11. Put engine in a vertical position.
409/(410 Blank)
|
||
|
||


