*C2
*C2
C H A P 5, SEC X X I II
R E V E R S E P L A N E T A R Y A N D S U P P O R T R E B U I LD
PAR 1 81
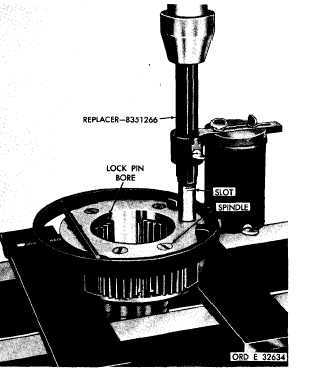
Figure 214. Removing planetary carrier spindles
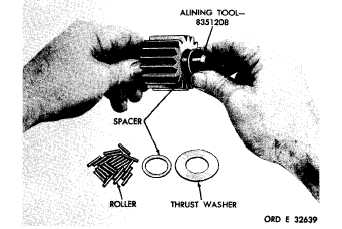
Figure 215. Assembling planetary carrier pinion
c o m p o n e n t s
b . Grease the inside diameter of plane-
tary carrier pinion (fig. 215).
c . Insert 22 spindle rollers into one end
of the pinion bore (fig. 215).
d . Place a thrust washer and spacer on
alining tool 8351208 (fig. 215).
e . Insert the alining tool 8351208, with
spacer and thrust washer, into the pinion.
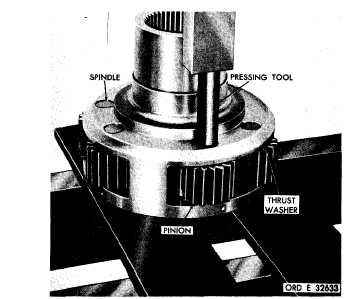
g . I n s t a l l a s p a c e r a n d t h e n a t h r u st
w a s h e r o v e r t h e a l i n i n g t o o l.
R e m o v e t he
alining tool (fig. 216).
h . Slide the pinion and its related parts
into the location in the carrier from which it
w a s r e m o v e d ( f i g . 2 1 7 ) . U s i n g a l i n i n g t o ol
8351208, aline the pinion, washers and rol-
lers. Remove the alining tool.
Figure 216. Installing planetary carrier pinion spacer
Figure 217. Installing planetary carrier spindle
1 4 8
|
|