TM 9-2520-272-34&P
4-29.
REPAIR CENTER HOUSING COMPONENTS
(SHEET 11 OF 31)
24
25
26
27
28
29
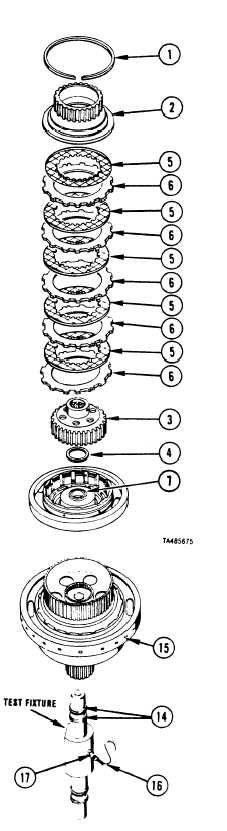
Coat thrust washer (4) with petrolatum. Install thrust
washer (4) in under side of body hub (3).
Install body hub (3) over retaining plate (7).
Soak five friction-faced clutch plates (5) in lubricating
oil for two minutes prior to assembly.
Install one reaction clutch plate (6), then one
friction-faced clutch plate (5). Continue until all five
plates (6) and five plates (5) are installed.
Install clutch assembly (hub) (2).
Using screwdriver, install retaining ring (1).
Check Assembled Clutch for Damaged Seals
30
Apply petrolatum onto two seals (14) on smaller hub of
the leak test fixture assembly. Install the fixture all
the way into clutch assembly (15).
WARNING
Compressed air used for testing purposes
must not exceed 30 pounds of pressure per
square inch Use only with effective chip
guards and protective personal equipment
including goggles or face shield and glove.
Never blow compressed air toward another
person.
31 Connect air hose (16) to coupling (17) and try to turn
hub (3). If hub (3) can be turned, repeat Steps 1
through 29 to replace damaged seals. If hub (3) will
not turn, the clutch assembly is OK.
FOLLOW-ON PROCEDURE: Install forward clutch
housing assembly. Refer to paragraph 4-30.
End of Task 4
Go to Sheet 12
Para. 4-29, Task 4
4-201
|
|