TM9-2815-202-34
(d) After grinding is completed, clean valve seat insert thoroughly. Measure concentricity of
insert in relation to valve guide. If runout exceeds 0.002 inch, check for bent or worn
valve guide before regrinding insert.
(e) Determine position of contact area between valve and valve seat insert as follows:
1. Apply a light coat of Prussian blue or equivalent to valve seat insert.
2. Lower stem of valve in valve guide and bounce valve on seat. Do not rotate valve.
3. Remove valve and observe area of contact on valve face. Most desirable area of
contact is at center of valve face.
(7) Exhaust valves and springs
(a)
(b)
(c)
Insure valve stems are free from
scratches or scuff marks. Valve
faces must be free of ridges,
cracks, or pitting.
Replace valves if warped,
excessively worn, or pitted.
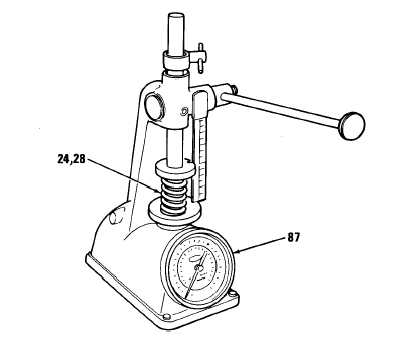
Using spring tester (87), replace
valve spring (28) when a load of
less than 25 Ibs will compress it
to 1.80 inches.
CAUTION
Replace both springs under an
exhaust valve bridge together.
Mating a new spring with a used
spring can cause unbalanced valve
operation.
(8) Cam followers and cam follower
springs.
(a) Examine cam follower springs
(24) for wear or damage. Using
spring tester (87), check spring
load. Replace spring when a load
of less than 172 Ibs will compress
it to a length of 2.125 inches.
4-197
|
|