
| Tweet |

Custom Search
|
|

|
||
 TM 9-2815-220-24
THREADED INSERT REPLACEMENT
THIS WORK PACKAGE COVERS:
Removal, Cleaning, Inspection, Repair, and Installation
INITIAL SETUP:
Tools:
Expendable and Durable Items:
Compressed air
Cleaning solvent (item 8, WP 0173)
General mechanic's tool kit (item 121, WP 0176)
Goggles (item 23, WP 0173)
Electric drill, portable (item 34, WP 0176)
Lubricating oil (item 21, WP 0173)
Extractor tool (item 39 or 40, depending on insert
Sealant compound (item 30, WP 0173)
size, WP 0176)
Personnel Required:
Slimsert tool kit (item 122, WP 0176)
Track Vehicle Repairer (1) 63H10
Thread die & tap set (item 120, WP 0176)
To permit higher stresses on studs and bolts that are set in aluminum castings, it is common
practice to install inserts of a stronger metal into which the studs or bolts are threaded.
Helical-coil and screw thread inserts are designated to perform this function. The AVDS-1790
family of engines incorporates helical-coil inserts in many locations as original equipment. If
the hole in which the original insert is installed becomes oversize, a threaded insert may be
used in its place to allow the original size fastener to be used.
REMOVAL
3. Remove insert (1).
a. Insert drive wrench (3) into insert (1).
1. Verify type of insert.
b. Using ratchet handle and drive
a. If insert is swage type, go to step 2.
wrench, unscrew insert (1).
b. If insert is lock-ring type, go to step 4
c. Go to Cleaning.
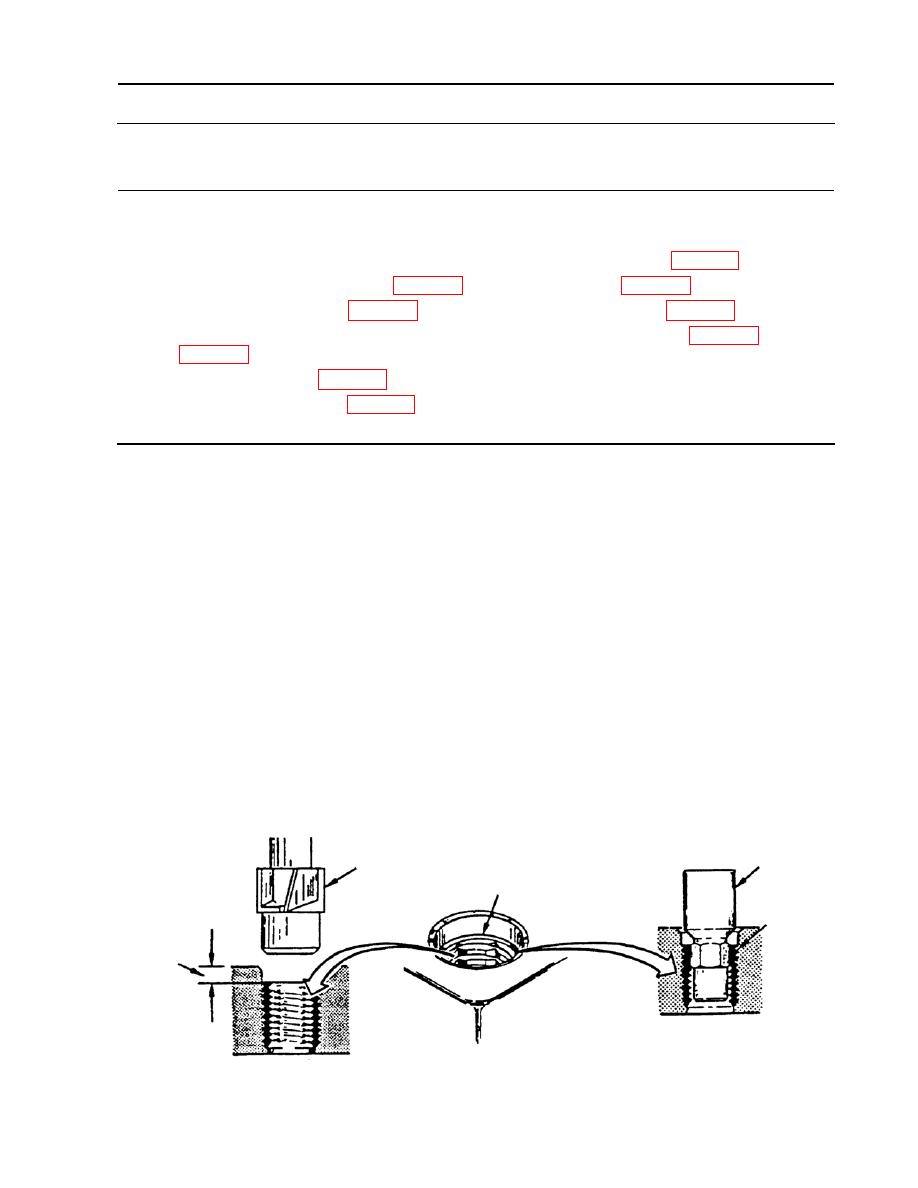
2. Removal of swage type insert (1).
a. Using portable electric drill and
extractor tool (2), drill out top of
insert (1) to counterbore depth (A).
3
2
1
1
A
WP 0030 00-1
|
||
|
||


