
| Tweet |

Custom Search
|
|

|
||
 TM 9-2815-220-24
CRANKCASE/TRANSMISSION ADAPTER ASSEMBLY REPLACE/REPAIR
0131 00
REMOVAL (Continued)
NOTE
Early model engines used slotted nuts with safety wire to secure the
crankcase adapter to the crankcase. If your engine has these
fasteners, cut, remove and discard the safety wire. Then remove and
discard the slotted nuts; use the self-locking nuts listed in mandatory
replacement parts for assembly.
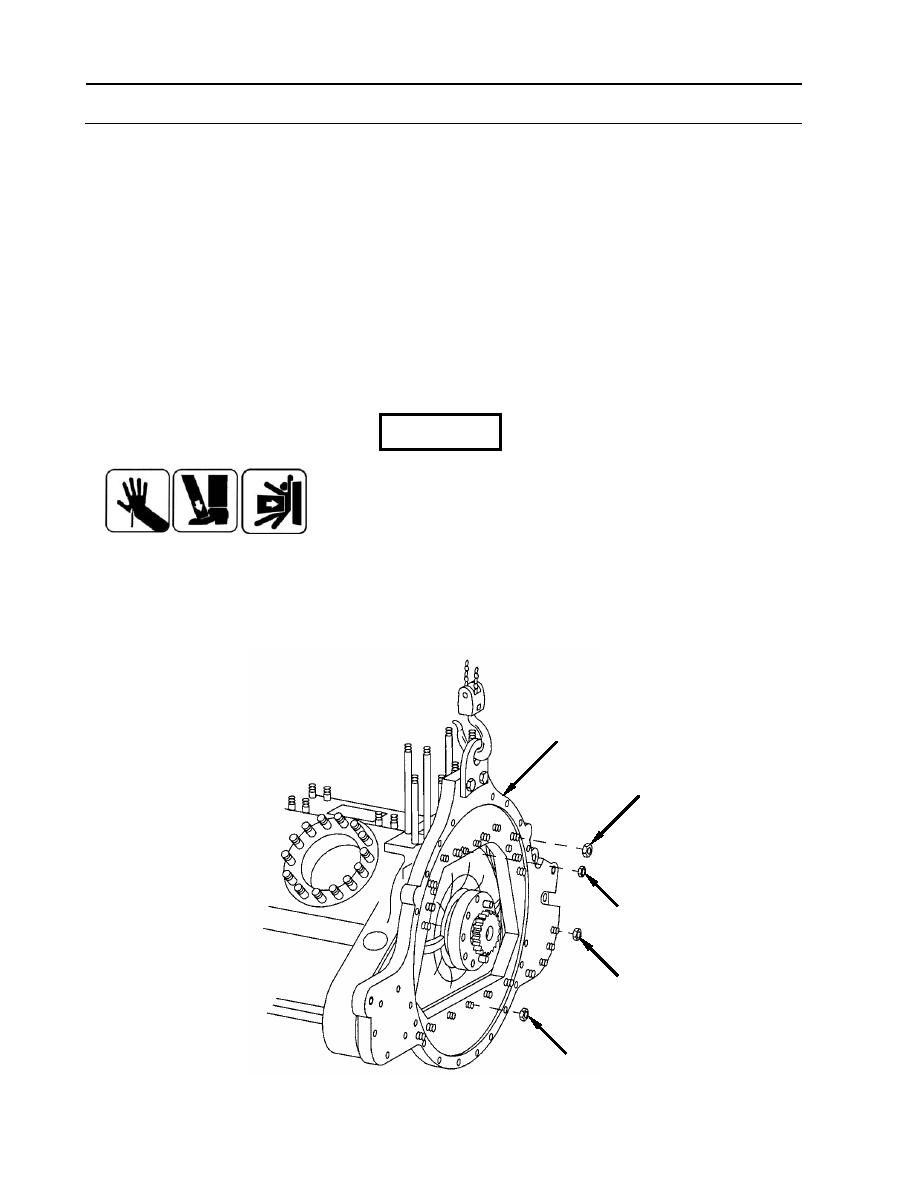
2. Remove and discard two self-locking nuts (2) at top of adapter (3).
3. Remove and discard 15 self-locking nuts (4) securing adapter (3) to crankcase.
4. Remove and discard four self-locking nuts (5) attaching adapter (3) to crankcase at starter pad.
WARNING
Crankcase adapter is heavy. Take care when
removing it so that it does not swing around and
injure personnel or equipment.
5. Loosen adapter (3) with a 3/4-inch brass punch and ball peen hammer.
3
4
2
5
4
WP 0131 00-2
|
||
|
||


