TM 9-2815-250-24&P
2-27. SOLENOID REPLACEMENT AND ADJUSTMENT (continued).
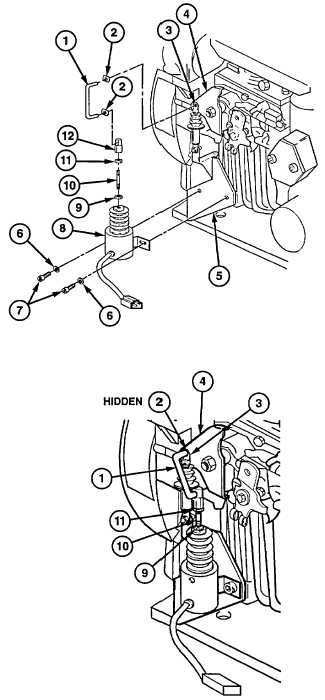
5.
Install two nuts (9 and 11) and connector (12) on
stud (10). Install stud (10) on solenoid (8).
6.
Install solenoid (8) and two washers (6) and
screws (7) on bracket (5).
7.
Install connecting link (1) in plunger (3),
governor lever (4), and solenoid (8). Secure
connecting link (1) with two clips (2).
c.
ADJUSTMENT
1.
Loosen two nuts (9 and 11) on stud (10).
2.
Remove top clip (2) from connecting link (1).
Remove connecting link (1) from governor lever
(4) and plunger (3).
3.
Rotate governor lever (4) fully counterclockwise,
to the off position, and push stud (10) all the way
down.
4.
Turn stud (10) until connecting link (1) reaches
governor lever (4) while stud (10) remains
pushed all the way down. Install connecting link
(1) in governor lever (4) and plunger (3).
5.
Tighten two nuts (9 and 11).
6.
Install top clip (2) on connecting link (1).
FOLLOW-ON TASKS:
None
2-32
|
|