
| Tweet |

Custom Search
|
|

|
||
 FUEL SYSTEM
TESTING AND ADJUSTING
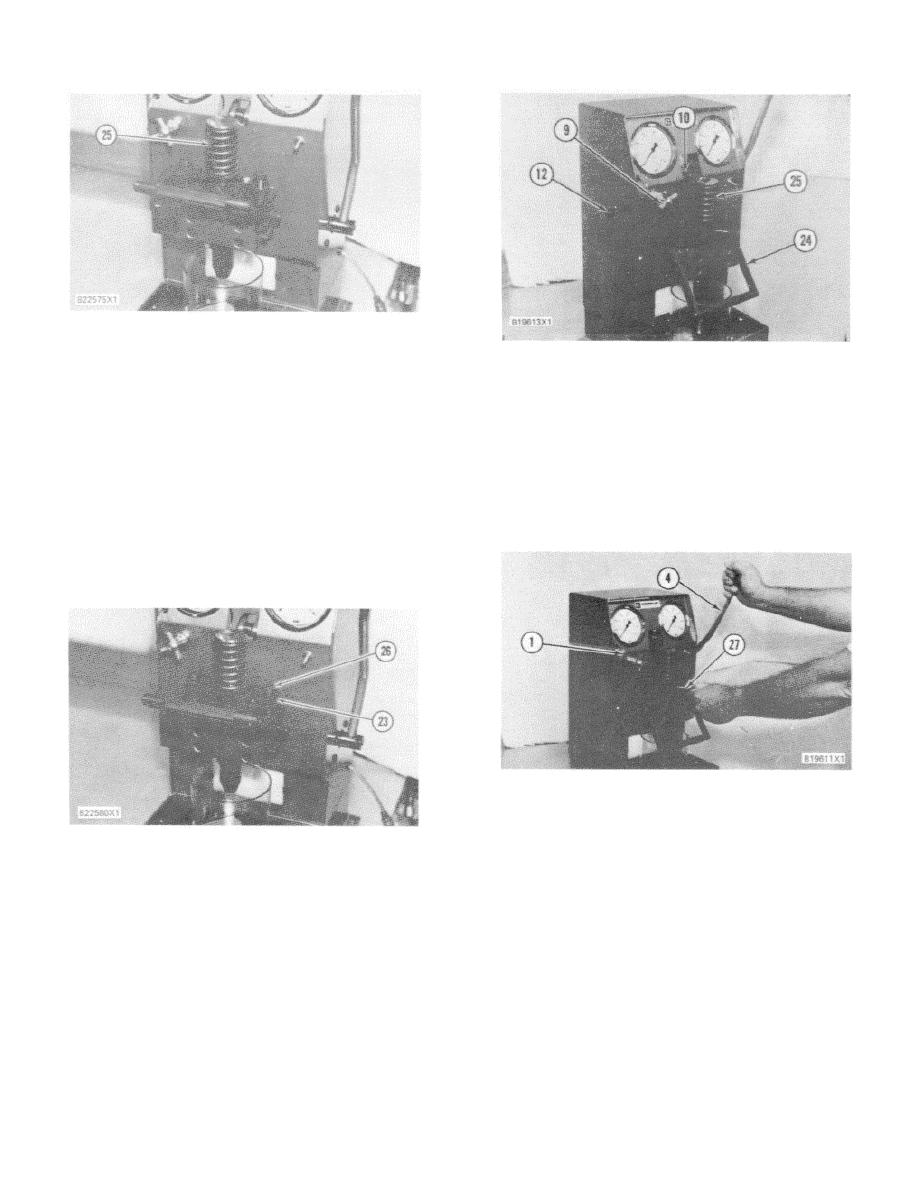
INJECTOR INSTALLED
25. Injector.
INJECTOR IN TEST POSITION
9. Test pressure valve, 10. Rocker arm. 12. Rocker
4.
Inspect the seals on the injector and install
arm control lever. 24. Clamp lever. 25. Injector.
replacement seals as necessary. To get a good
test, the injector must have good seals. Put
7.
Open test pressure valve (9). Use control lever
clean test fluid on the seals for lubrication, then
(12) to retract rocker arm (10).
install injector (25) in bore (A) of the injector
block, with the dowels engaged as shown.
8.
Pull rack (27) all the way out. Move handle (4)
backward and forward to pump (push) the test
NOTE: Use only clean test fluid as a lubricant for the
fluid into and through the injector, until no air
seals. Use of any other lubricant can make a mixture
bubbles can be seen in sight tube (1).
that will give test information that is not correct.
5.
Turn clamp plate (23) so the slot is completely
engaged with bolt (26).
AIR REMOVAL FROM TESTER
1. Sight tube. 4. Handle. 27. Injector rack.
9.
When no more air bubbles can be seen in sight
CLAMP PLATE CLOSED
tube (l), release handle (4) to its original upright
23. Clamp plate. 26. Bolt.
(released) position. Use control lever (12) to
extend rocker arm (10) as shown.
6.
Push down fully on clamp lever (24) to pull
injector (25) into the test position.
10.
With rocker arm (10) in the fully extended
position, operate handle (4) for 10 to 12 strokes.
NOTE: Make sure clamp lever (24) is all the way down.
This will activate injector (25) and remove any air
High pressure caused by the test will put an upward
that is inside the injector.
force on injector (25).
111
|
||
|
||


