*C2
C H A P 5, SEC II
D I S A S S E M B L Y
P A R 75, S T E P S 4 7 - 5 0
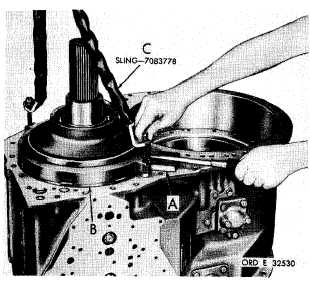
Figure 111 (Step 47)
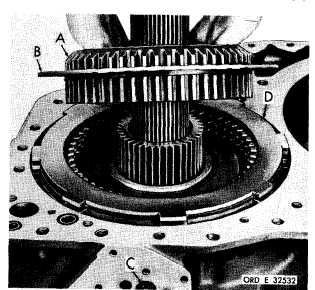
F i g u r e 1 1 3 ( S t e p 4 9)
U s i n g a w o o d e n b l o c k ( A ) a n d s c r e w d r i v e r,
pry up on reverse-range support housing and
c a r r i e r a s s e m b l y ( B ) e n o u g h t o a t t a c h s l i ng
(C) with two bolts and nuts. Remove support
housing and carrier assembly (B).
R e m o v e r e v e r s e - r a n g e r i n g g e a r a s s e m b ly
( A ) a n d o n e i n t e r n a l - s p l i n e d c l u t c h p l a t e ( B)
U s i n g a 9 / 1 6 - i n c h w r e n c h , r e m o v e r e v e r s e-
r a n c e a n c h o r b o l t ( C ) , a n d l o c k w a s h e r a nd
f l a t w a s h e r . R e m o v e r e m a i n i n g r e v e r s e -
r a n g e c l u t c h p l a t e s ( D)
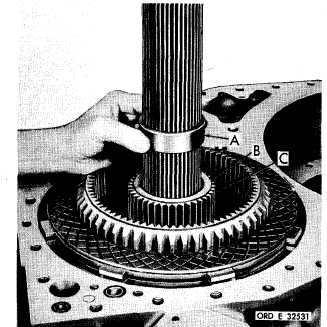
Figure 112 (Step 48)
Remove spacer (A) and thrust washer (B) from
reverse-range sun gear (C).
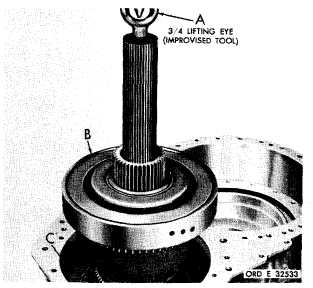
Figure 114 (Step 50)
Using hoist and lifting eye (A), remove low-
and intermediate-range carriers, and low and
reverse-range clutch piston housing as an as-
s e m b l y ( B ) .
C a u t i o n: Be careful that low-
range clutchplates (C) do not fall out with re-
moval of assembly (B).
9
6
|
|