CHAP 5, SEC XXX III
A S S E M B LY
P A R ‘227, S T E P S 3-6
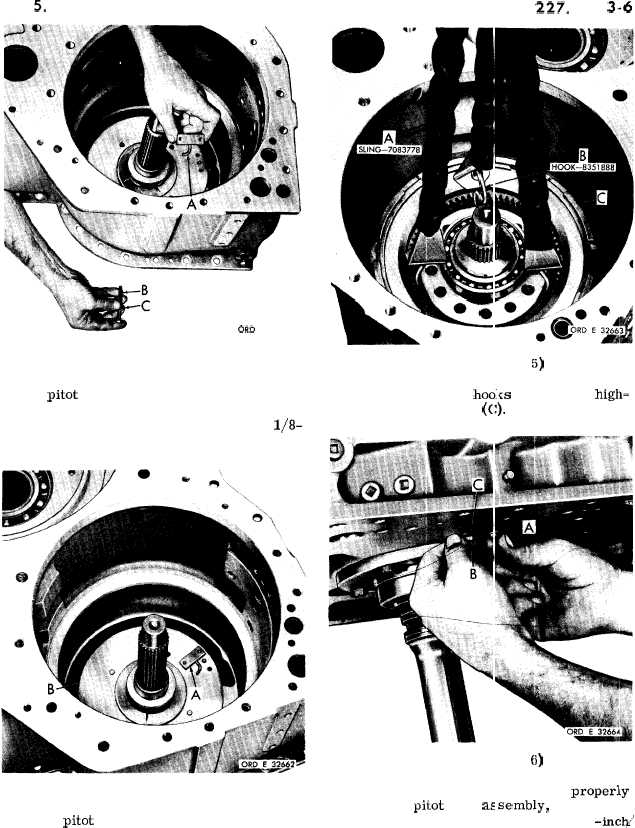
ORD E 32661
Figure 242 (Step 3)
Install pitot tube assembly (A) and retain with
one of two 1/4-28 x 2- 1/2 self-locking bolts
(B) and flat washers (C). Leave the bolt l/8-
inch loose.
Figure 243 (Step 4)
Position pitot tube assembly (A), as shown,
on diaphragm clamp plate (B).
Figure 244 (Step 5)
Using sling (A) and hoo:w (B), install high-
range clutch assembly ((:).
Figure 245 (Step 6)
While turning bolt (A) clockwise to properlly
position the pitot tube ak sembly, install bolt
(B) and flat washer (C). Using a 7/16 -incly’
wrench, torque both bolts to 10-12 pound-fee{.
164
|
|