
| Tweet |

Custom Search
|
|

|
||
 TM 9-2815-220-24
HELICAL-COIL INSERT REPLACEMENT
0029 00
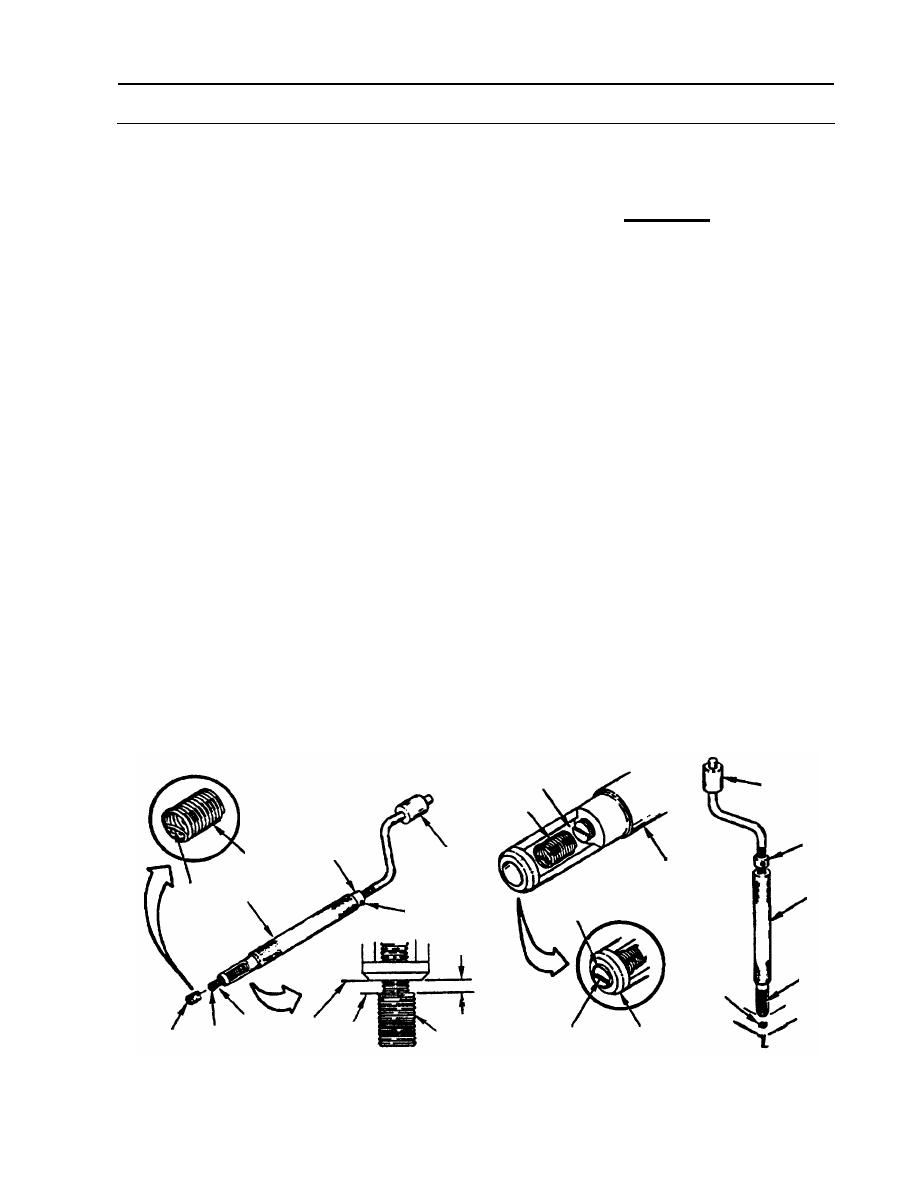
7. Turn handle (9) until tang (A) of insert
INSTALLATION
(1) is even with tip of insertion tool (6).
1. Loosen setscrew (5).
CAUTION
2. Install new insert (1) on insertion tool (6).
Insertion tool must be straight and
a. Turn handle until shaft (7) extends
not allowed to wobble when
past tip of insertion tool (6), slightly
installing insert. Equipment can
longer than length of insert (1).
be damaged. Do not force insert
b. Screw new insert (1) on shaft (7) until
into tapped hole. Threads will be
tang (A) of insert goes into shaft
damaged.
notch (B).
8. Install new insert (1).
3. Set depth of insertion tool (6).
a. Put tip of insertion tool (6) against
a. Adjust distance (C) between end (D)
tapped hole (G) being sure that
of insert (1) and tip (E). Turn handle
insertion tool is straight.
until distance is equal to installation
depth below surface of tapped hole.
b. Slowly turn handle (9) of insertion
See procedural work package for
tool (6) to the right until stop collar
proper installation depth.
(8) contacts body of insertion tool.
b. Push down stop collar (8) until it
c. If insert (1) does not go into tapped
contacts body of insertion tool (6).
hole (G) easily, go to step 9. If
insert (1) does go into tapped
c. Tighten setscrew (5).
hole (G) easily, go to step 12.
4. Remove insert (1) from insertion tool (6).
9. Remove insertion tool (6).
5. Turn handle (9) until shaft (7) retracts
a. Turn handle (9) of insertion tool (6)
fully into insertion tool (6).
counterclockwise until insertion tool
6. Place insert (1) in opening (F) of
can be removed.
insertion tool (6).
9
F
1
8
9
1
8
6
A
6
6
5
1
C
1
G
7
E
D
B
A
6
1
1
WP 0029 00-3
|
||
|
||


