
| Tweet |

Custom Search
|
|

|
||
 TM 9-2815-220-24
CAMSHAFT, DRIVE GEARS, AND ASSOCIATED PARTS REPLACEMENT
0146 00
ASSEMBLY
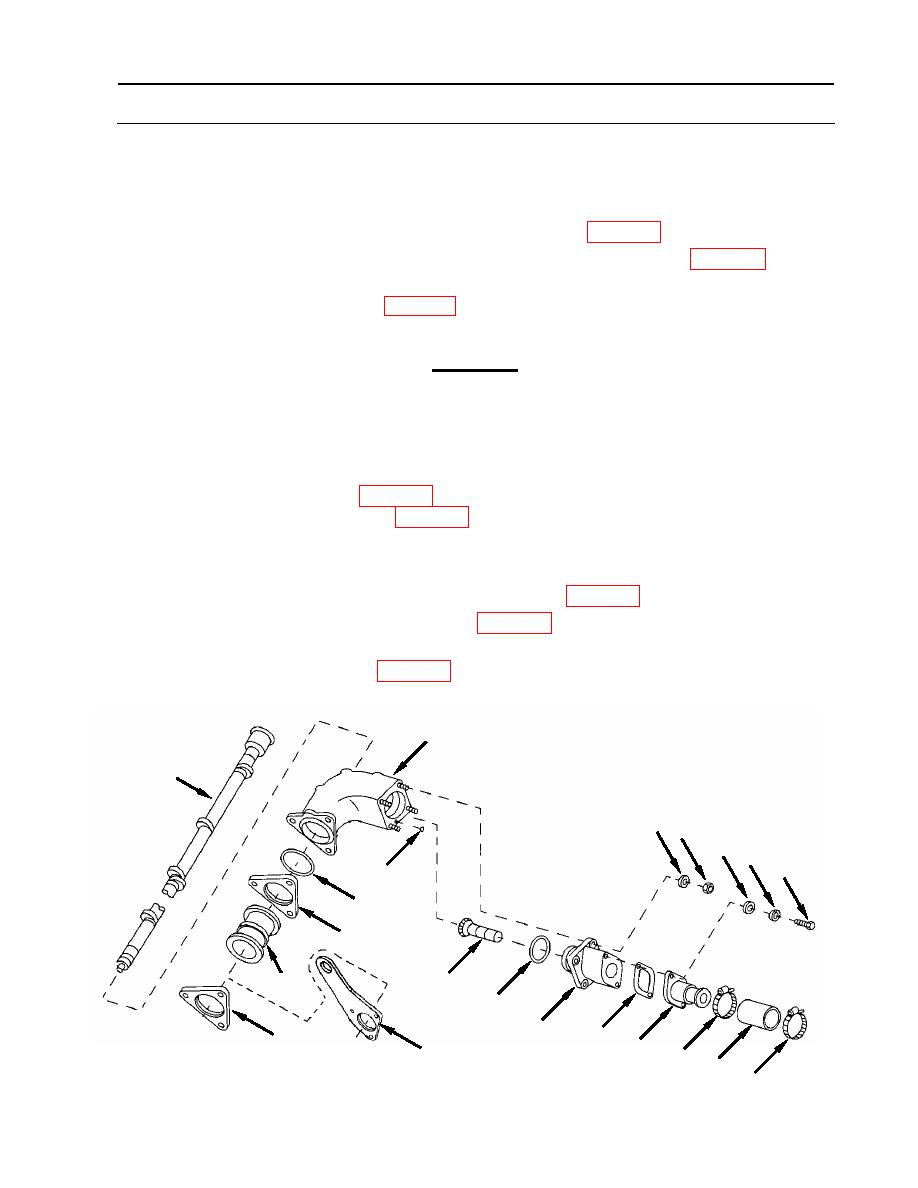
1. Install camshaft assembly (10) into drive housing (18).
2. Install hose adapter (25) to gear adapter (22).
a. Install hose adapter (25) using new gasket (31) (item 361, WP 0175) to gear adapter (22).
b. Secure using two screws (28), with two new lock washers (29) (item 95, WP 0175) and flat
washers (30).
c. Install new hose (21) (item 181, WP 0175) and secure with one hose clamp (11). Snug-
tighten second hose clamp to opposite end of hose.
CAUTION
Take care when installing gear adapter that bevel gear shaft does not
fall out. If gear shaft falls out and lands on cement floor, it could be
damaged.
3. Install gear adapter (22).
a. Using Lubriplate (item 23, WP 0173), lubricate and install two new O-rings (26,27)
(items 61 and 69, respectively, WP 0175).
b. Lubricate and then insert bevel gear shaft (7) into gear adapter (22).
c. Install gear adapter (22), hose adapter (25), and bevel gear shaft (7) as an assembly.
d. Secure using four new self-locking nuts (23) (item 139, WP 0173) with flat washers (24).
4. Lubricate and install new O-ring (20) (item 5, WP 0175).
5. Install camshaft flanges (16) lifting eye (17) (2CA and 2DA engines only) and five new inter-
cylinder sleeves (19) (item 248, WP 0175).
18
10
24 23
30
29
28
27
20
16
7
19
26
22
31
16
25
17
11
21
11
WP 0146 00-11
|
||
|
||


