| Tweet |

Custom Search
|
|

|
||
 AIR INLET AND EXHAUST SYSTEM
TESTING AND ADJUSTING
Bridge Dowels
5.
Turn adjustment screw (5) clockwise until it just
makes contact with valve stem (3). Then turn
Use a 5P944 Dowel Puller Group with a 5P942
the adjustment screw 20 to 300 more in a
Extractor to remove the bridge dowels. Install a new
clockwise direction to make the bridge straight
bridge dowel with a 6V4009 Dowel Driver. This dowel
on the dowel, and to make compensation for the
driver installs the bridge dowel to the correct height.
clearance in the threads of the adjustment
screw.
BRIDGE ADJUSTMENT
When the cylinder head is disassembled, keep
the bridges with their respective valves. To make an
adjustment to the bridges, use the procedure that
follows:
NOTE: The only time bridge adjustment is necessary is
when a valve has been replaced, ground, or cylinder
head has been reconditioned. Valves must be fully
closed when adjustment is made. To find when valves
are fully closed, see subject FINDING TOP CENTER
POSITION FOR NO.
1 PISTON and chart
CRANKSHAFT POSITIONS FOR INJECTOR TIMING
AND VALVE CLEARANCE SETTING.
BRIDGE ADJUSTMENT
1.
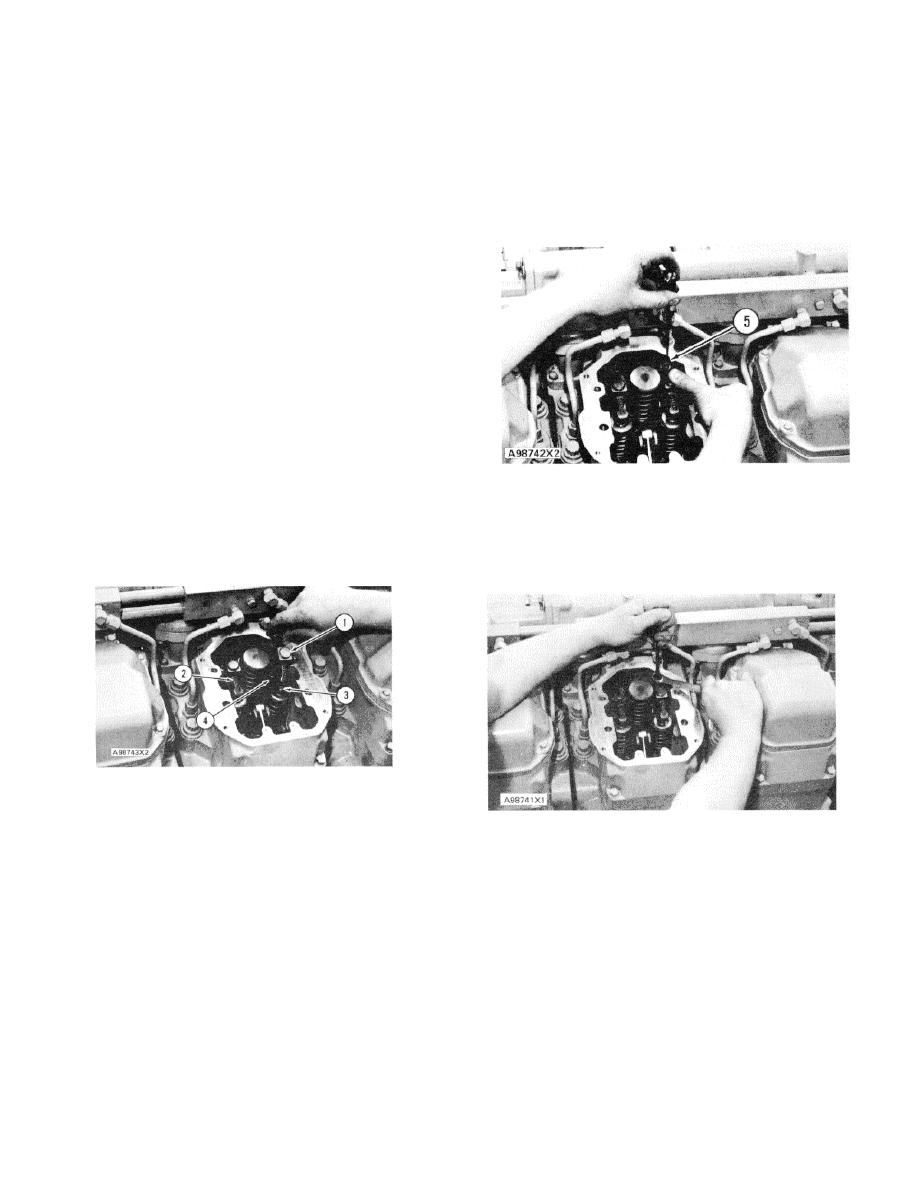
Put engine oil on bridge dowel (4) in the cylinder
5. Adjustment screw.
head and in the bore in bridge (2).
6.
Hold adjustment screw (5) in this position and
2.
Install bridge (2) with adjustment screw (5)
tighten the locknut to 30 4 Nm (22 3 lb. ft.).
toward the exhaust manifold.
BRIDGE INSTALLATION
1. Top contact surface. 2. Bridge. 3. Valve stem. 4.
Bridge dowel.
TIGHTEN LOCKNUT
3.
Loosen the locknut for adjustment screw (5) and
loosen the adjustment screw several turns.
7.
Put engine oil on top contact surface (I) where
the rocker arm makes contact with the bridge.
4.
Put a force of 5 to 45 N (I to 10 lb.) by hand
straight down on top contact surface (I ) of
bridge (2).
135
|
||
 |
||