P A R 2 2 7 - 2 2 8
A S S E M B LY
C H A P 5, SEC X X X I II
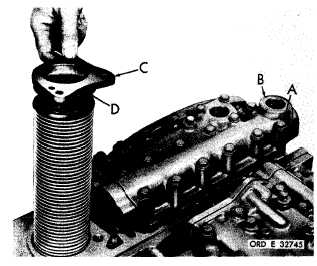
Figure 326 (Step 87)
Install eighteen 5/16-18 x 3-1/4 bolts (A) with
flat washers to retain lockup shift and pres-
sure regulator valve body assembly (B). Us-
ing a 1/2-inch wrench, torque bolts to 13-16
p o u n d - f e e t . I n s t a l l m a i n o i l s c r e e n a s s e m b l y
(C). Be sure that oil seal ring (D) is in place.
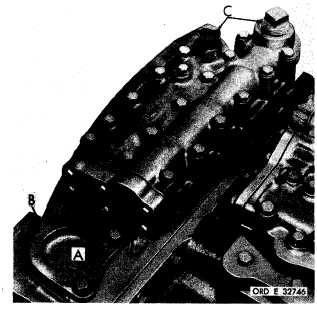
Figure 327 (Step 88)
Install three 3/8-24 x 1-1/8 bolts (A) with lock
w a s h e r s t o r e t a i n m a i n o i l s c r e e n a s s e m b ly
( B ) . U s i n g a 9 / 1 6 - i n c h w r e n c h , t o r q u e b o l ts
t o 3 3 - 4 0 p o u n d - f e e t . F o r c l e a n l i n e s s , t e m p o-
rarily install two 1-inch pipe plugs (C).
2 2 8 . A S S E M B L Y S T E P S –
I N P U T T R A N S F E R A S S E M B LY
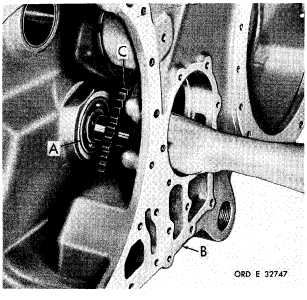
Figure 328 (Step 1)
Install bearing assembly (A) in input transfer
housing
(B).
Install
input
oil
pump
drive
gear (C).
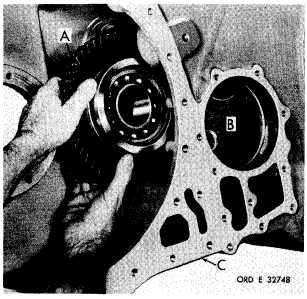
Figure 329 (Step 2)
I n s t a l l i n p u t t r a n s f e r i d l e r c l u s t e r g e a r a nd
bearing assembly (A), alining it with spindle
bore (B) in housing (C).
1 8 5
|
|


