
| Tweet |

Custom Search
|
|

|
||
 TM 9-2815-220-24
CYLINDER ASSEMBLY REPLACEMENT
0133 00
INSTALLATION (Continued)
1. Rotate maintenance stand so cylinder assembly (1) is vertical.
2. Install new O-ring (12) on cylinder (1) base.
a. Apply light coat of lubricating oil (item 21, WP 0173) to new O-ring (12) (item 79,
b. Position O-ring (12) on cylinder (1) base making sure that it is not twisted or otherwise
improperly seated.
NOTE
Assembly of piston rings to piston is covered in WP 0142, Pistons,
Rings, and Associated Parts Replace/Repair.
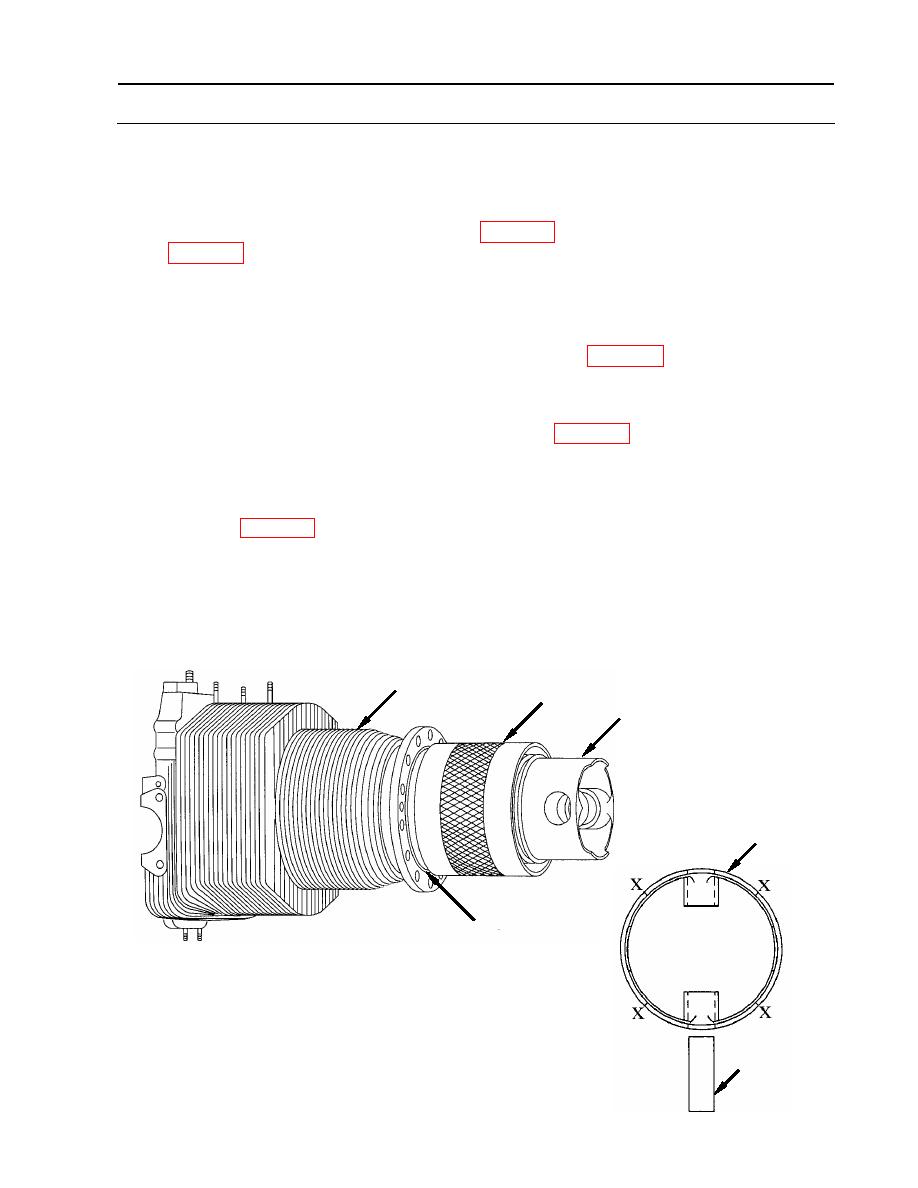
3. Install piston (6) into cylinder assembly (1).
a. Coat sides of piston (6) with lubricating oil (item 21, WP 0173).
b. Stagger the four piston ring gaps 90 degrees apart from each other and ensure ring gaps do
not line up with piston pin (10) (see illustration below).
c. Install piston (6) and rings in cylinder assembly (1) using piston ring compressor (13)
(item 21, WP 0176). The piston position number must always correspond to the cylinder
number marked on intake valve side of valve rocker flange. The arrow on the piston boss
must be directed toward the exhaust port outlet.
d. Guide piston (6) and rings into cylinder assembly (1) until all piston rings have entered the
cylinder bore.
e. Slide the piston ring compressor (13) from piston (6).
1
13
6
6
12
X marks ring gap locations
10
WP 0133 00-9
|
||
|
||


