| Tweet |

Custom Search
|
|

|
||
 TM 9-2520-281-34
CAMSHAFT ASSEMBLY, RIGHT BANK, REPAIR
0150 00
INSPECTION
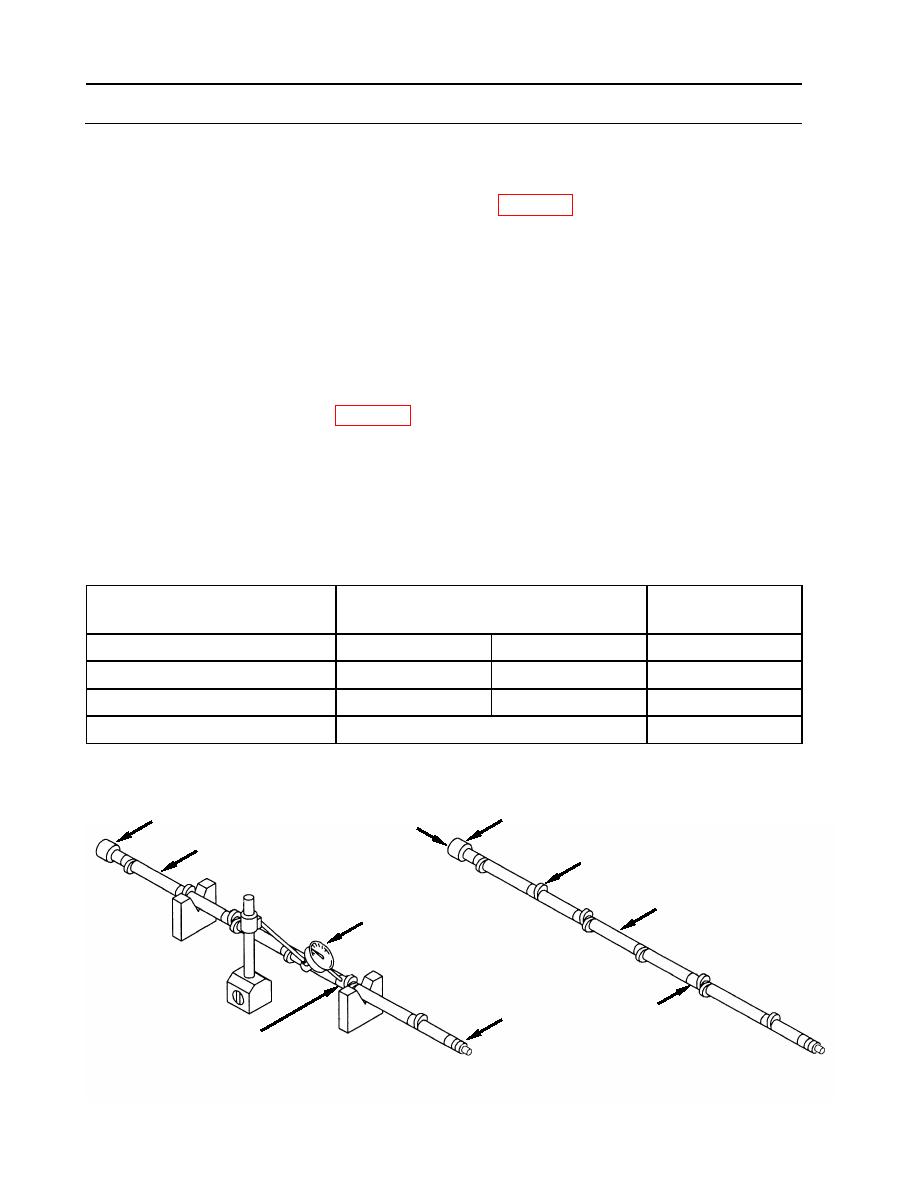
1. Visually inspect camshaft (6).
a. Look for cracks with a magnifying glass (item 73, WP 0176) and a strong light. Pay
particular attention to areas around camshaft lobes (A). Replace any camshaft that has
cracks.
b. Inspect camshaft lobes (A) and camshaft journals (B, C) for wear, scuffing and scoring.
Replace camshaft when lobes or journals are badly worn, scuffed or scored. Mark light
scuffing or scoring for repair.
c. Inspect camshaft for stripped or damaged threads in tapped holes (D). Replace camshaft if
any stripped threads are found. Mark damaged threads for repair.
2. Measure camshaft (6).
a. Using micrometer (item 17, WP 0176), measure outside diameter of large journal (B).
b. Measure outside diameter of seven smaller journals (C).
c. Measure outside diameter of camshaft (D) at pilot bearing interface.
d. Check camshaft (6) journals (B, C) for out-of-roundness with a dial indicator (7) (full
indicator reading with V-block directly under journal).
e. Reject any camshaft that does not meet the limits specified in the following table.
Location
Sizes and Fits of New Parts
Wear Limits
inches (mm)
B (Large journal diameter)
2.4965 (63.4111)
2.4975 (63.4365)
2.4960 (63.3984)
C (Small journal diameters)
1.3090 (33.2486)
1.3100 (33.274)
1.3085 (33.2359)
D (Pilot bearing interface)
1.3090 (33.2486)
1.3100 (33.274)
1.3085 (33.2359)
B, C (Journal roundness)
0.0010 (0.0254)
0.0020 (0.0508)
B
B
D
6
A
6
7
C (7 places)
E
C
WP 0150 00-2
|
||
 |
||