
| Tweet |

Custom Search
|
|

|
||
 TM 9-2815-220-24
OIL PAN ASSEMBLY REPLACE/REPAIR
0152 00
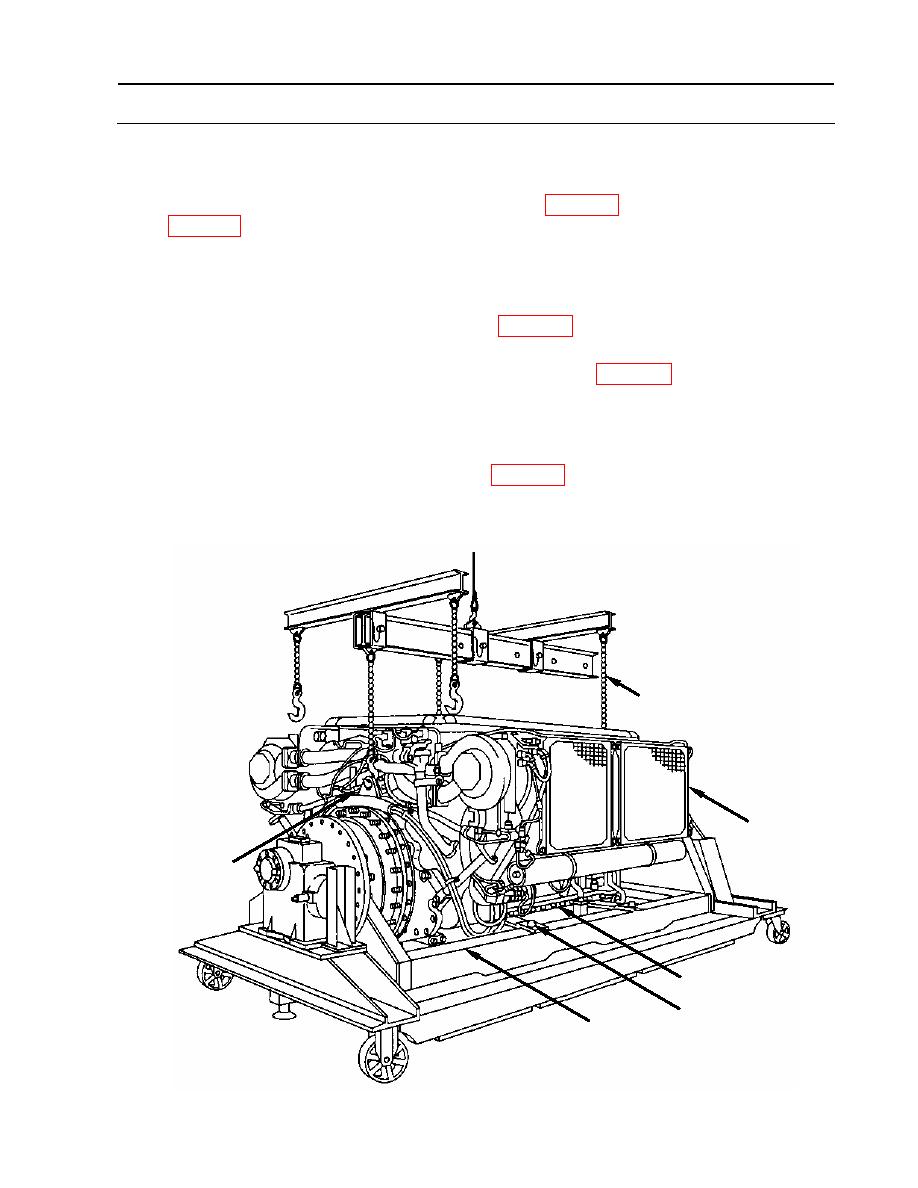
INSTALLATION (Continued)
1. Install oil pan. (Continued)
c. Attach sling assembly (10) (For 2CA/2DA, item 38, WP 0176) (For 2DR, item 37,
d. Take slack out of lifting device and remove four screws (13) and four flat washers (14)
securing engine to rollover stand (15).
e. Lift engine (11) from maintenance stand (15) and carefully lower onto the oil pan (1).
f. Install two new self-locking nuts (8) (item 34, WP 0175) with flat washers (9) (one on each
side of pan, near the center) to secure oil pan (1) to engine (11).
g. Mount engine (11) onto maintenance stand (15) (item 111, WP 0176).
(1) Secure engine (11) to maintenance stand (15) with four screws (10) and four flat
washers (11).
h. Remove sling assembly (10).
i. Install 27 new self-locking nuts (8) (item 34, WP 0175) with flat washers (9) on each side
of oil pan (1).
j. Alternately tighten 56 new self-locking nuts (8) to 275-300 inch pounds (31-33.9 Nm).
10
11
12
8,9
13,14
15
WP 0152 00-11
|
||
|
||


