| Tweet |

Custom Search
|
|

|
||
 TM 9-2815-220-24
THREADED INSERT REPLACEMENT
0030 00
REMOVAL (Continued)
C
6
5
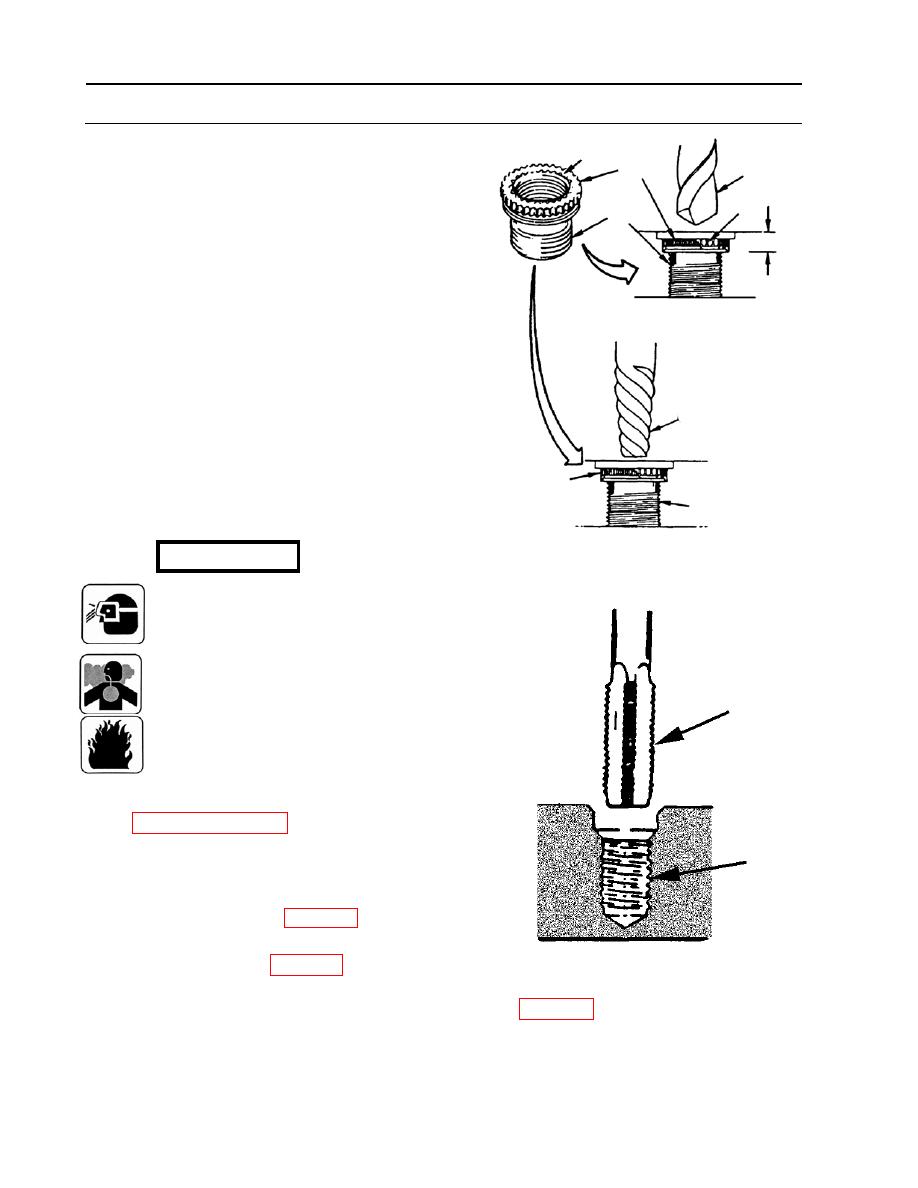
4. Remove lock-ring type insert (4).
A B
a. Using portable electric drill and drill
4
bit (5), drill through lock-ring (6) and
neck (A) of insert (4).
b. Drill to existing counterbore
depth (B).
c. Remove all serration interlocks (C)
on lock-ring (6) and neck of
insert (4).
d. Drive screw extractor (7) through
lock-ring (6) into insert (4).
7
b. Using screw extractor (7), unscrew
insert (4). Lock-ring (6) will be
6
forced out with insert (4).
4
CLEANING
WARNING
Compressed air can injure you
and others. Do not aim air at
personnel. Do not use more than
30 psi. Always wear goggles.
Cleaning solvent is mildly toxic.
Solvent evaporates and both the
9
fumes and liquid are flammable.
See Warning in front of Manual.
1. See Work Package 0028 for Standard
Cleaning Procedures.
8
2. Clean component (8) threads.
a. Lubricate thread cutting tap (9) with
engine oil (item 21, WP 0173).
b. Using tap wrench and thread cutting
tap (9) (item 120, WP 0176), clean
component (8) threads by slowly
c. Flood with cleaning solvent (item 8,
turning tap in and out of component
threads.
blow dirt and any loose metal chips
out of component (8) threads.
WP 0030 00-2
|
||
 |
||