
| Tweet |

Custom Search
|
|

|
||
 TM 9-2815-220-24
WIRING HARNESS AND CABLE REPAIR
0056 00
REPLACEMENT OF CONNECTORS (Continued)
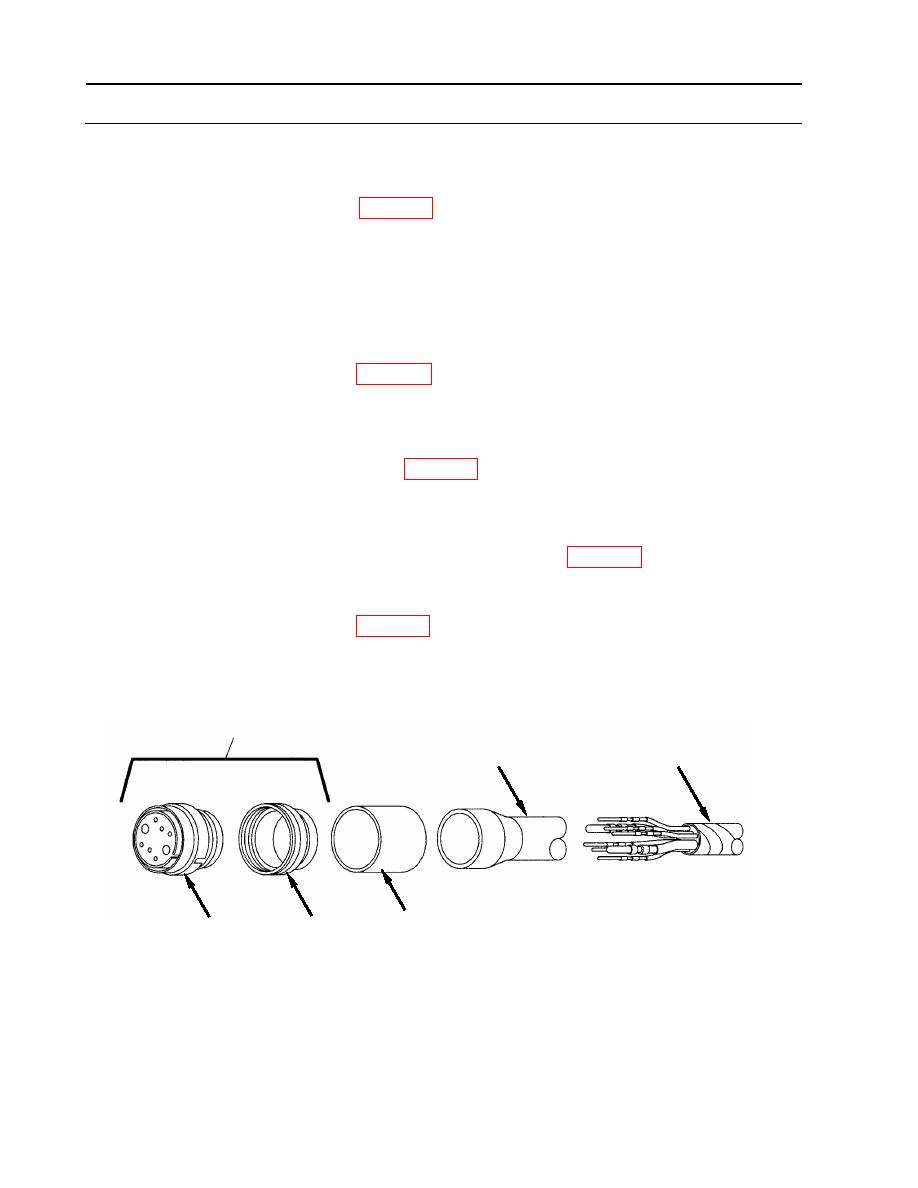
Disassembly of Waterproofing Connectors
1. Using electrical heat gun (item 63, WP 0176), heat boot (A) on shell assembly (B) and roll
back on cable (C).
2. Unscrew nut (D) from connector (E) and slide back on cable (C).
Assembly of Waterproofing Connectors
1. Apply sealing compound (item 33, WP 0173) on threads of shell assembly (B).
2. Screw nut (D) onto connector (E).
3. Apply an even layer of adhesive (item 1, WP 0173) on the shell assembly (B) and roll
boot (A) onto the shell assembly (B). Ensure the cavity between shell assembly (B) and
boot (A) is filled with adhesive.
4. Place 3-inch piece of heat-shrink insulating tubing (item 35, 36, WP 0173) (F) over at least a
quarter of nut (D) to half way down the boot assembly (A).
5. Using electrical heat gun (item 63, WP 0176), heat tubing (F) until a water-tight fit is
achieved. Shim tubing as needed to attain a water-tight fit.
B
A
C
F
D
E
END OF WORK PACKAGE
WP 0056 00-20
|
||
|
||


