
| Tweet |

Custom Search
|
|

|
||
 TM 9-2815-220-24
OIL COOLER REPLACEMENT, ENGINE AND TRANSMISSION
THIS WORK PACKAGE COVERS:
Removal, Disassembly, Cleaning, Inspection, Assembly and Installation
INITIAL SETUP:
Tools:
Expendable and Durable Items:
Air pressure source
Cleaning compound, solvent (item 8,
General mechanic's tool kit (item 121, WP 0176)
Cloth, abrasive, crocus (item 9, WP 0173)
Oil cooler cleaning tool (item 20, WP 0176)
Goggles (item 23, WP 0173)
Thermometer (item 119, WP 0176)
Lubricating oil, engine (OE 30) as needed
Suitable container (5-gallon (19-liter) minimum)
(item 27, WP 0173)
Mandatory Replacement Parts:
Personnel Required:
Gasket (2) (item 330, WP 0175)
Track Vehicle Repairer (1) 63H10
Gasket (2) (item 315, WP 0175)
Equipment Conditions:
Nut, self-locking (6) (item 33, WP 0175)
Engine removed from vehicle and on flat level
O-ring (2) (item 141, WP 0175)
surface
Dust ejector tubes removed (WP 0083)
NOTE
The oil coolers on each side of the engine are removed in the same manner.
Removal of right coolers is described in the following instructions. Your
particular engine may have slightly different harness brackets from those
illustrated; however, they are mounted in a similar fashion and are removed
similarly.
Model AVDS-1790-2DR oil cooler removal and installation instructions are
similar to those described below except that this engine is not equipped with
a top-mounted engine wiring harness, nor is the oil sampling system on the
coolers; instead, a valve on the oil filter/damper housing serves the purpose.
REMOVAL
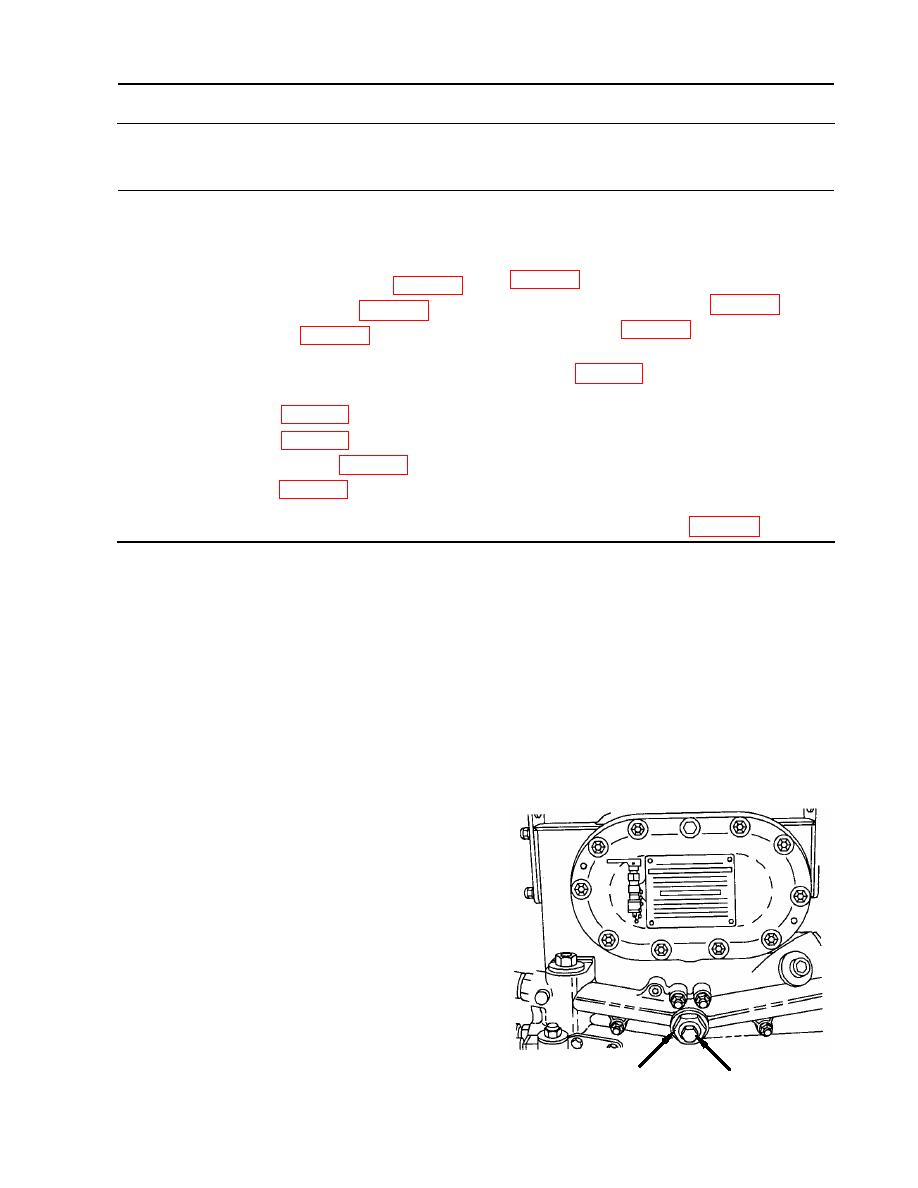
NOTE
Step 1 opens an internal passage
allowing oil to drain from the
engine oil coolers into the oil pan.
1. Drain engine oil coolers.
a. Loosen oil drain valve (1) six complete
turns. Do not loosen oil drain valve
adapter (2).
2
1
WP 0072 00-1
|
||
|
||


