| Tweet |

Custom Search
|
|

|
||
 TM 9-2815-220-24
OIL SEAL HOUSING ASSEMBLY AND ASSOCIATED PARTS
REPLACEMENT
0136 00
REPAIR (Continued)
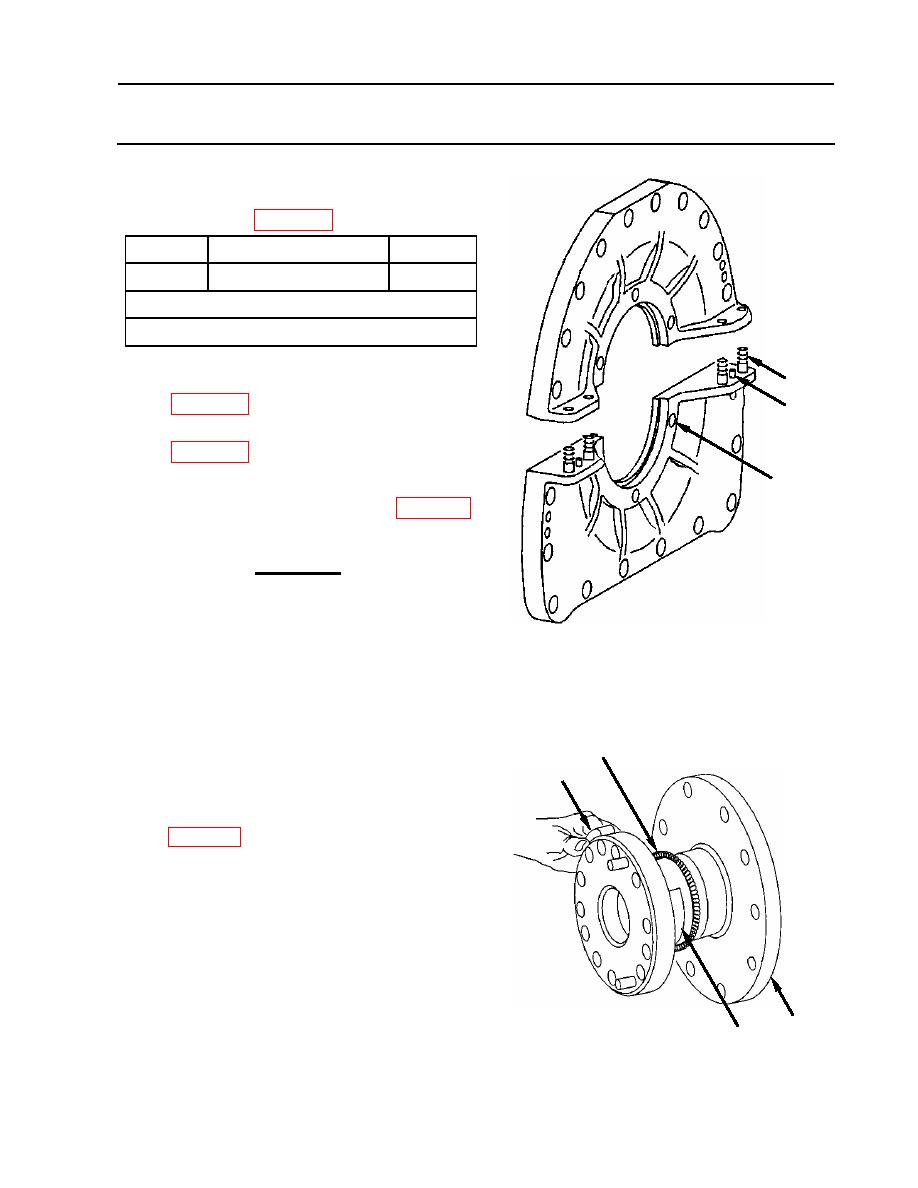
1. Replace bent, stripped, or otherwise damaged
studs (15). See WP 0028.
Callout
Setting Height
Quantity
15
31/31 (24.6062)
4
Stud Dimensions
5/16-18 (51/64) x 5/16-24 (21/32) x 1-5/8
15
2. Replace defective screw thread inserts (16).
See WP 0028.
9,10
3. Replace loose or damaged dowel pins (9,10).
See WP 0028.
INSTALLATION
16
1. Install new oil seal (12) (item 285, WP 0169)
onto crankshaft (13).
CAUTION
One end of seal spring must be turned
2-1/2 turns in relation to the opposite
end for proper engagement. Failure to
comply may lead to crank seal leakage.
a. Install new oil seal spring (14) onto
crankshaft (13). Pre-load spring by
twisting the male end counterclockwise
and the female end clockwise, then insert
14
the male end into the female end and
12
release.
b. Apply silicone compound (item 34,
installing new split oil seal (12).
NOTE
Groove in split oil seal must face
damper end of crankshaft.
c. Install new split oil seal (12) onto
crankshaft (13).
13
d. Position oil seal spring (14) in split oil
12
seal (12) so that splits in each piece are
180 degrees apart.
WP 0136 00-5
|
||
 |
||