|
|
|
|

|
TM 9--2815--247--34
0070 00--7
CONNECTING ROD ASSEMBLY AND ASSOCIATED PARTS REPAIR --
CONTINUED
0070 00
Inspection -- Continued
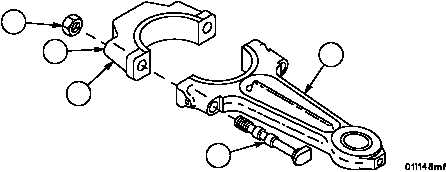
11. Apply lubricant to rod bolt threads (13) and nut seat (15).
12. Assemble rod (3) and cap (2), and torque tighten both nuts (1) alternately to 100--150 lb--in (11.3--16.95 NSm);
then to 50--54 lb--ft (67.8--73 NSm); then to 105--108.5 lb--ft (141--146 NSm); then to a final torque of 150--154
lb--ft (203.4--209 NSm).
Figure 8
1
15
2
3
13
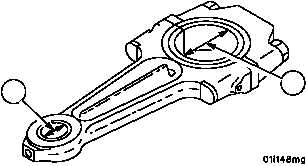
13. Measure inside diameter (16) of rod bearings. Replace bearings that do not meet the following limits.
14. Measure inside diameter (17) of piston pin sleeve bushing. Replace bushings that do not meet the following lim-
its.
REF
NO.
POINT OF MEASUREMENT
SIZES AND FITS OF NEW PARTS
inches (mm)
WEAR LIMITS
16
Inside diameter of bearing at
proper torque tightness
standard
0.003 (0.0762 mm) undersize
0.010 (0.254 mm) undersize
3.7546 (95.36684)
3.7516 (95.29064)
3.7446 (95.11284)
3.7568 (95.42272)
3.7638 (95.60052)
3.7468 (95.16872)
3.7573 (95.43542)
3.7543 (95.35922)
3.7473 (95.18142)
17
Inside diameter of bushing type
sleeve bearing
2.1275 (54.0385)
2.1277 (54.04358)
2.1248 (53.96992)
Figure 8
16
17
|
|
|
|
 |
Privacy Statement -
Copyright Information. -
Contact Us


