TM 9-2920-243-34
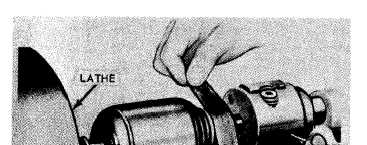
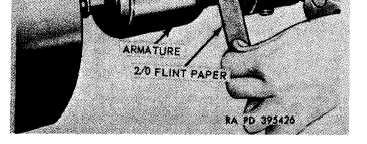
Figure 3-34. Polishing armature commutator with sandpaper.
Section III.
3-16. General
a. Instructions covering assembly of the starter
are almost identically the reverse of those
covering disassembly. Therefore, the following
assembly procedures, for the most part, will be
referenced to paragraphs appearing in section II.
When this occurs, instructions appearing with
each referenced paragraph should be performed in
reverse order from which they are given.
For example, if reference is made to paragraph 3-
12 then disassembly subparagraphs a throughd
and any instructions contained therein also
should be performed in reverse order. Throughout
assembly procedure, it will be assumed that the
referenced disassembly instructions must be
performed in reverse order to accomplish the
assembly procedure.
Instructions
B2
Index
No.
6
14
18
58
10
12
28
8
4
ASSEMBLY
b. Figure B-2 in appendix B of the manual
provides a visual reference to relationship of
components of starter and for parts identification.
c. Four parts kits are provided for use in repair
and rebuild of the electrical engine starter
assembly. When any component of a kit requires
replacement, all parts in the kit should be
replaced at the same time. Whenever the starter
is rebuilt, complete contents of gasket and seal
parts kit should be used.
3-17. Lubrication
The lubricants listed in table 3-1 should be
available for use during assembly. Table 3-1 lists
lubricant, part to which it is applied, and method
of application. Make certain that these in-
structions are performed during assembly.
Point of
lubrication
Preformed packings
Table 3-1. Lubrication Instructions
Lever assy: In shaft bore on slider
blocks
Coupling: In pin holes
Armature assy: On splines
Drive assy: In inner
Oil wicks
Lubricant
OIL, lubricating (OE-30), MIL-L-
2104
GREASE,
aircraft
and
instrument,MIL-G-23827
GREASE,
aircraft
and
instrument, MIL-G-23827
OIL, lubricating, (OE/HDO-10)
MIL-L-2104
OIL, lubricating (OE/HDO-10)
MIL-L-2104
OIL, lubricating (OE-30), MIL-L-
2104
Apply lightly
Apply lightly on contact surfaces.
Apply lightly on contact surfaces.
Apply lightly on contact surfaces.
Apply lightly on contact surfaces.
Soak until saturated.
3-15
|
|


